Tuesday, May 15, 2012

Fish Soup-Stew


You must be wondering... 'Fish soup? Er... wouldn't it be too overwhelming on the fishy taste and smell? Ugh' Well, I shall let you decide for yourself because everyone has different taste on fish : ) We were watching a TV program on BBC called 'Two Greedy Italians' and they cooked up this dish and it looked so yummy. And so, we've decided to give it a try... how bad can it be, right?

The ingredients are fairly simple and easy to get. And here goes the cooking part...

First, slice up some onion and garlic. Then fry them briefly in a pot with some cooking oil. Add in a can of chopped tomatoes (or equal amount of fresh tomatoes), some proper red wine and a fresh chilli into the pot. We didn't have fresh chilli, hence, used dried chilli as an alternative. Then for herbs, put in parlsey and fennel seeds. Well, I modified it and just poured in my handy bottle of mixed herbs : P
Last but not least, season with some pepper and salt, and then let it simmer for about 10 minutes. If you find that the soup texture is too thick, you can add in water.

As the soup is simmering away, we can start putting in the condiments. First, I put a proper fish - with head, tail and a skeleton... into the soup to boil. Hehe. You know lah, everything in the UK are all packed nicely with just meat only, rarely with bones : P Anyways...

Depending on the size of the fish, let it simmer for at least 10 minutes. Then take the fish out and remove the meat from its frame. The bones and head can be thrown away. Once this is done, you can start putting other seafood condiments such as mussels, prawns and other types of fish meat into your soup. Remember to put the meat that takes the longest time to cook first, followed by the shorter time. Prawns should be inserted last as it cooks very fast. For this attempt, I bought a sea bass and a tray of fish mix (used in fish pie)... Wished I've bought some prawns and mussels though : ( As you are putting in the seafood, season the soup with salt as the taste may start to become bland due to more ingredients in the soup.


Once the rest of the seafood is cooked, put the deboned fish back into the soup, give it a good stir to mix up everything proper and it is ready to serve!

We served it with pasta, but bread is fine too! 


The outcome of this dish was somewhat different than what we would have expected. There is a hint of spicyness and at the same time, it felt like we were having Assam Laksa all over again. Well, I guess it is like the Italian version of it : ) One thing to note is, do not put too much fish as what we did. Otherwise, it would be too fishy! Hahahahaha! And another point to remember is to have a moderate portion of seafood ingredients. We were stuffed after having a bowl of it. Oh yes, I would recommend to start the cooking with high heat and then change it to medium heat. Mine almost got burnt... that's because we changed our cooking hobs and I can't gauge the heat. Rosak liao! And and AND... always stir the soup too!

TheLoyalFan says: ' Tasted like the western version of Assam Laksa. Will need to use less fish the next time and make sure fishes are of the "fresh smelling" kind. Very filling...'

Seems like we're both agreeing on the same points. Will I try this again? Yea, I would but not so soon though. Maybe next month or later... If you want to find out who are the chefs in that TV program, please feel free to check it out from here!

Till then, keep nomming!

Saturday, May 12, 2012

Maggi Goreng


Also known as Fried Maggi Noodles, this dish is a very common dish to all Malaysians. A casual trip to the Mamak Shop (a coffee shop business run by Indian Muslims), this is definitely one of the frequent orders made other than the famous Roti Canai.

As a special birthday treat, this dish was prepared by TheLoyalFan. ^_^ To be honest, his stir-frying skills are much better than mine and it's nice to take a break too!

So here goes...

First, chop up some onions and garlic (optional). For the ingredients of the noodle, it is really quite flexible. As long there's some meat, veggie and egg, it is A-okay!!! For ours, we always check what leftovers we have and just fry them up.

Slice up some lettuce and some meat. Place your instant noodles into a bowl with hot water and let it soak until it is semi-soft. Probably about 1 minute. The point here is to make it slightly softer but don't cook it completely. Otherwise, your noodle would be soggy at the end of the frying process.

Drizzle some cooking oil into your pan/wok and stir fry your onions. When they are fragrant, put in your meat and fry until it is almost completely cooked. Then beat an egg. Once the egg is cooked on one side, pour in the drained noodles and pour the curry flavour seasoning. Give it a good toss until all seasoning is evenly distributed. Last but not least, throw in your lettuce and give it a good stir. And finished!


As an alternative, you can try using similar ingredients as the Mamak chefs back home. If you plan to use cabbage, fry the cabbage before you fry the egg because it takes longer to cook the cabbage.

Souschef Su says: 'This always reminds me of home. Really yummy and I like the springy texture of the noodles. Would be great if there's some dahl (lentil) gravy served together. Mmmm!'

Well, since I was not the chef who prepared it, I thought for a change lah that I comment! Hehehehehe...

Have a great weekend everyone!

Thursday, April 26, 2012

Spaghetti Cabonara


Back home, I always remember that we would order this at Italian restaurants to eat this creamy, fragrant and rich dish. The price of it is quite expensive and at times some restaurants doesn't do a good job. Hence, it either tasted too rich or too bland - not very balance.

During our stay here in Manchester, we decided to learn some simple western dishes in order to adapt to the local taste and cuisine. This is to keep our cost of living lower and at the same time, enjoying what the 'Gwei Lous' eat : )

One of the simple western dish was this - the Cabonara. Again, at first, we thought it was a difficult dish to prepare. But when we first tried it out, it was so simple that I remembered we made this twice a week. LOL!

So, here goes...

First, slice up some onions and 2 cloves of garlic. Then slice up smoked bacons and mushrooms. The reason of using smoked bacon is that it gives more flavour to the dish and your mushroom will be tastier too!

In a separate bowl, beat an egg and add equal portion of single cream. Add in some finely grated cheese into the bowl and give them all a good whisking to combine all goodies together!

Before you start frying the ingredients, boil your spaghetti - very important : P

Next, heat up your pan with a knob of butter. Cooking oil would be just fine too! Fry the onion and garlic until it is fragrant then pour in the bacons and mushrooms. Give it a good 3-5 minutes fry, until the bacons and mushrooms are thoroughly cooked. Season some pepper and salt during the stir-fry. Once your spaghetti is ready, drain the water and pour the spaghetti into the pan. Remove the pan from direct heat and pour in the creamy mixture into the pan. Give it a proper toss until everything is evenly mixed.

Et voila! C'est tout!

Spaghetti Cabonara with cream. The cream is starting to have tiny lumps.

Spaghetti Cabonara with milk.

Mmm... Cabonara... yum yum! The cream gives a very rich texture to the dish. However, I would prefer using milk instead because I like to enjoy my Cabonara without feeling all stuffed and bloated.

Oh yes, another thing I noticed is that when you use cream, one must toss it quickly and remove it from any heat! This is to avoid the cream mixture from splitting. When it splits, you'll notice that the egg is starting to cook and there would be lumps.

TheLoyalFan says: 'Cream makes all the difference! Silky and creamy, and aromatic from the smoked bacon... ooo yums! Made me remember why carbonara was among my favourites!'

Cabonara checked!!! Trust me, if I can do it, so can you!

Have fun!

Wednesday, April 25, 2012

Cream of Mushroom Soup

Alrightie, time to try out some western recipes : )

We have decided to give this recipe a go because we were watching one of those cooking shows from the Internet and thought, 'Wow, doesn't seem too complicated for a mushroom soup, isn't it?' And so, mushroom soup we decided to try. LOL!

First, we diced up the mushrooms. We bought some chestnuts and some buttons for our simple soup. According to the recipe, you can use ceps and/or porcini as it gives a fuller flavor in the soup. Dice some onions as well. Once the dicing is completed, fry the onion and mushroom with a knob of butter! Mmm... very fragrant!


Remember to fry the mushroom until it is completely brown. I think about 5 minutes or more. Otherwise, you will get 'half cooked' taste mushroom which not many people like the funky taste, especially me - NO LIKES! When the mushrooms are ready, pour in your chicken stock into the mixture and let it simmer away! Oh yes! Herbs! You'll need some thyme (I think) for your soup. For me, I have a bottle of mix herbs so I just pour some in lah! : P

After 15 minutes of simmering, pour in some crème fraîche a.k.a. fresh cream. I would strongly recommend that you slowly scoop dollops by dollops to mix into your soup... Otherwise, your soup would taste very rich. And the final step - ready to serve!


The soup supposed to look a little more on the brown color side... hehe. For this dish, there were a couple of mishaps in the kitchen : ( First, I accidentally put in too much butter. Therefore, if you look closely at the photo above, you'll notice there's a lot yellow droplets. Secondly, I didn't fry my mushrooms long enough and so, it tasted a bit raw, in which I didn't like the taste of it. Thirdly, I put too much of cream!!! Aaarghh!!! I got a little bit over zealous when pouring the cream. Hence, I recommend the 'dollops by dollops' method.

With all these mishaps happened, the soup still tasted quite OK although it was rich with the cream. However, with a little tweak for the next round, I'm sure that it would turn out just fine and tasty!

TheLoyalFan says: 'Never knew it was so easy to make. First attempt was yums! But will need to go easy on the cream the next time though... hehe'


And there you have it... my first attempt of the Cream of Mushroom Soup : P


Till then, keep nomming!


Saturday, April 21, 2012

Steamed Egg with Mince Pork

Steamed egg is another 'ching' dish and I really like it very much. The texture of the egg is smooth and silky, at the same time, this dish doesn't make you feel all stuffed when you eat it a lot! Hehehe.

I think there are many ways of cooking steamed egg. The famous Japanese chawanmushi, for example, is also a variation of the steamed egg. As for the Chinese, there are 3 kinds that I know of - the standard steamed egg, 3 types of eggs and the egg with mince pork. LOL! So here goes...

Beat 2 eggs into a bowl and add equal volume of water with the egg. Whisk them together and put it aside. In a separate metal plate with a little depth, marinate the mince pork with soy sauce, oyster sauce, pepper and a pinch of corn flour. Once the marinate is complete, spread out the mince to cover the base of the plate with a fork (or spoon ^_^).

Prepare the pan / wok with boiling water and a steamer stand. Once the water starts boiling, turn down the heat. Pour the egg mixture onto the metal plate and season with some pepper. Place the metal plate onto the stand and steam for about 7 - 10 minutes, depending on the size of your dish. Here's the tricky bit - you'll need to keep an eye on the dish in order to ensure that your meat is thoroughly cooked.


The egg is finally ready! If you fancy, you can garnish with some spring onion too!

Needless to say, this was absolutely satisfying. Although it is not a fancy smanchy dish, it reminded so much of home cooked food and the Chinese restaurant's food back home. A real comfort food for both of us.

Juicy and nice! Om nom noms... 

If you like your egg to be tastier than this version, you can add in some soy sauce and pepper into the mixture before you pour onto the mince. I guarantee you that it compliments super well (yes, super duper well) with rice : P

TheLoyalFan says: ' So smooth and soothing... Makes you miss home.'

Well, it does made us miss home... but this dish does help us cope with our occasional 'home sick' ^_^

Till then, keep om nom noming!

Friday, April 13, 2012

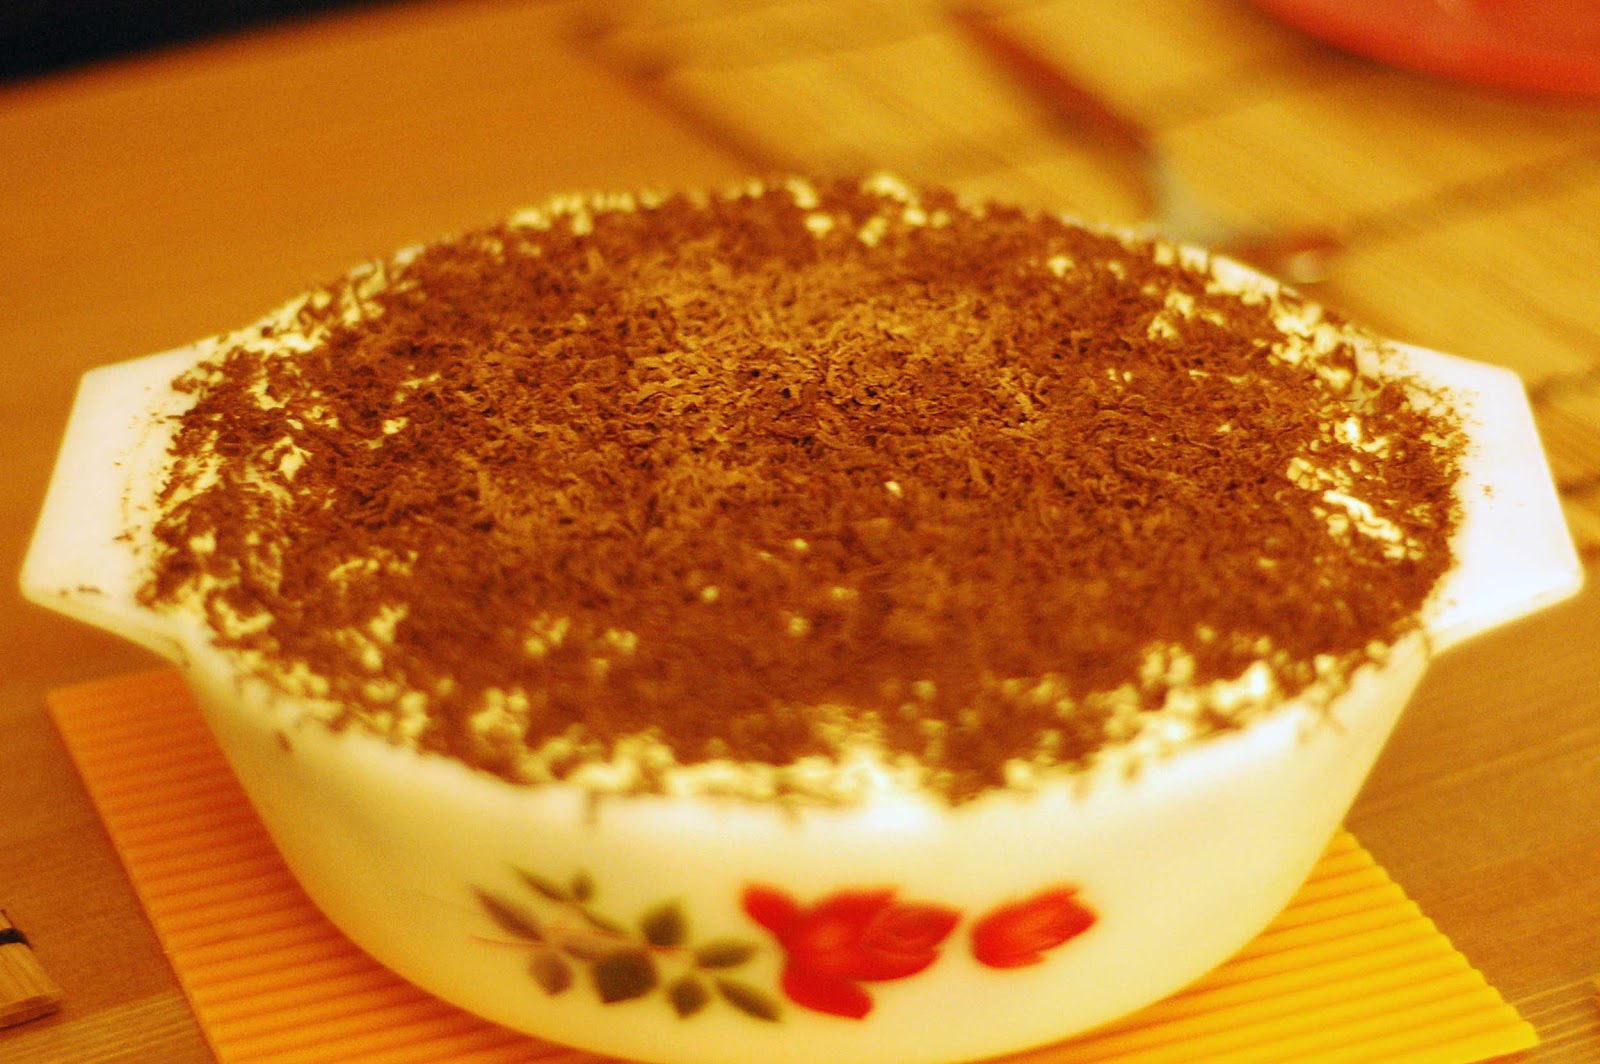
Quick Tiramisu


We went to visit my sister and TOH up north in Scotland last week during the Easter Break and it was really nice and fun. We visited the famous Loch Ness and even had some lovely fish & chips at Stonehaven. Yum yums!

During our stay in Aberdeen, my sister, SZ wanted to make tiramisu and I decided to join in and help out : )

I always thought that this cake is really difficult to make. However, the recipe that SZ found was fairly simple and I thought of sharing this on my blog. And here goes...

First, prepare a bowl of black coffee and put aside to let it chill. In a separate bowl, beat together 2 egg yolks and caster sugar for about 3 minutes until the mixture is thick and pale. Add in mascarpone cheese into the mixture and beat until it is well mixed. Then fold in the whipped cream gently with a metal spoon.

Using another bowl, beat the egg whites until soft peaks are formed. Remember to ensure that the bowl is squeky clean and dry. Else, the egg white will not formed. Once done, quickly fold the white into the cream mixture.

Once the cream mixture is complete, it is time to 'create' the cake : ) Dip sponge finger biscuits into the coffee. Shake off any excess of the liquid and arrange the biscuits to cover the base of a nice serving bowl.
Once the base is 'created', put a dollop of the cream mixture onto the biscuit. Make sure the cream mixture covers the biscuits. Repeat the layering process until you reach to the brim of the bowl. The finishing layer should be the cream mixture.

Once the layering is complete, you can either dust some cocoa powder or chocolate shavings onto the top. Place the bowl in the fridge to set for at least 2 hours.

Tadaaa!

Tiramisu in a bowl.. yum yum!

Can you the layering effect?

We made some modifications of the recipe found on the Internet. We did not pour in Amaretto (sweet, almond-flavoured, Italian liqueur) and we used decaffeinated coffee. For the exact recipe and measurements, please click here.

Although there are some beating and whipping needed, I must say that this is surprisingly simple and really delicious! It was not very sweet and the texture was creamy and nice. This recipe is worth keeping and preparing again!

TheLoyalFan says: 'I can't believe it is so simple! Very high level of yummyness for so little work.'

SZ says: 'Lusciously yummy and surprisingly easy to make.'

I can't wait to make this again! It's really good and I think I had more than 2 extra helpings... hehehe. Nom Nom Noms!

Have a great weekend!

Monday, April 2, 2012

Steamed Chicken


Steamed chicken is a very 'ching' dish. 'Ching' which literally means, clear in english, doesn't just mean it has clear gravy or a bland taste. To the Chinese, it simply means a simple and tasty dish but its flavour is not too overwhleming. Somehow this 'ching' taste comforts one's soul. Well, for me, 'ching' dishes always make me feel happy and all fuzzy inside : P

There are a couple of ways to make this steamed chicken. One is to marinate the chicken with salt and steam it; the other method will be marinating more than just salt. The Hainanese has its famous steamed chicken method where it is boiled in boiling water and soaking the cooked chicken in icy cold water. But today, I found a recipe that is simple yet very tasty.

Firstly, ensure your chicken meat is completely thawed to room temperature. This is to ensure that all areas of the meat has a consistent texture and the meat will be cooked evenly. Give the meat a good rinse and place it in a plate. Marinating requires only 3 ingredients - Chinese wine, white pepper and light soy sauce. For this, I recommend that the soy sauce and wine should be 3 tablespoon each. Scatter some shredded ginger onto the chicken.

Prepare the pan/wok with water and a steaming stand. Once the water is boiling, place the plate onto the stand and let it steam for about 30 - 40 minutes. Occasionally, use a spoon and drizzle he juice in the plate onto the meat.

Once the chicken is completely cooked, drizzle on some garlic oil and spring onions.


Tadaaa!

Doesn't it look yummy? Well, not only did it look so yummy, I was already drooling when I smelt the aroma of it! *slurp slurp slurp*

The chicken meat was really smooth and tasty. It reminded me so much of the 'pak cham' chicken back home at the chicken rice shop. We didn't make any oyster sauce dip as there were lots of good nutritious chicken 'essence' stored in the plate. The essence was tasty and not too salty. Also, it was really nice with rice too. Ooo... what a feeling! *nom nom noms!*

TheLoyalFan says: 'Super smooth chicken and extremely yummy sauce. Our extra helpings of rice did not last long... hehehe.'

*Blushing* Yea... it was really good and I had second helpings of rice : )

Till then, keeping nomming!