Showing posts with label Chicken. Show all posts

Monday, September 29, 2014

ABC Soup

You may wonder... How did this soup got its name. What ingredient represents A, B or even C? My mum calls it ABC soup; my mum-in-law calls the same name too. Hmmm, I guess maybe because it is really, really easy to prepare and it is just as simple as ABC ^_^

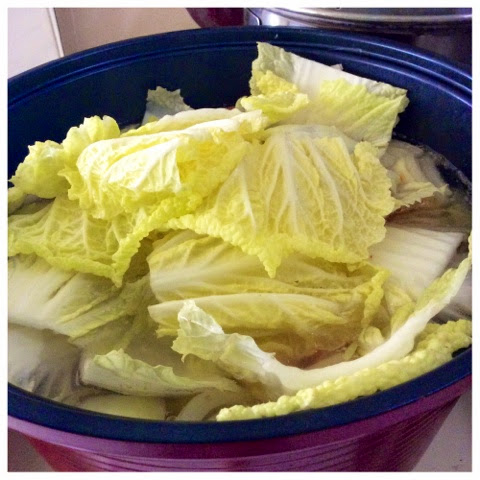
Firstly, cut up some carrots, potatoes, tomatoes and an onion (heehee the words rhyme!). If you have Chinese cabbage in your fridge, you can chop some up too! The Chinese cabbage adds sweetness in the flavoring. 

Before that, boil a pot of water with some chicken or pork. Preferably parts with bones such as drumsticks, thighs, ribs or the porky's legs. Once done with the chopping, put all the veggies into the pot. Let it boil for about 20 minutes and turn down the heat to let it simmer for another 30/40 minutes. You can add in a chicken cube for seasoning, or salt / soy sauce is fine as well.


And that's it! Your soup is ready to serve and be eaten! XD


Have a great Thursday and weekend will be here sooner than you think. ^_^

Tata!


Thursday, September 25, 2014

Express Baked Chicken & Mushroom Pasta!

Yup, you read that right... Express version. LOL! When I was trying to figure out how to make this chicken pasta, I searched over the Internet and found some useful recipes. But I thought, I'll try to keep it simple lah! Instead of creating my own white sauce, I've replaced with canned mushroom soup ^_^

Alright, so here's my cooking experiment...


First, slice up some onions and chicken meat. You can either buy canned mushroom that has been sliced, or the whole mushroom. If it is whole, just slice them up too! Marinate the chicken with some pepper. I used grounded black pepper but I think white pepper is fine. Just use whichever type of pepper you have okie?

Boil the pasta until it is al dente. If it is very soft, it might break into small pieces when we mix our ingredients. While the pasta is being cooked, in a separate pan (or wok), stir fry the onion until fragrant. Then tip in the chicken and fry them until they are quite cooked. Add some herbs - mixed herbs or thyme / basil are fine. I prefer stronger herbs so mixed herbs or oregano are okay for me. Remember to pour in the mushroom when the chicken is about 90% cooked. The canned mushroom is already cooked so that sort of saves time for me. 

Once the pasta is ready, drain them and pour them into the wok. Add in the mushroom soup into the mixture. Pour in some water in the can, maybe 1/3 in order to clean out the remainder that is stacked in it. Stir stir and mix mix everything until all ingredients are well coated. Yum! 

Oh yes, remember to heat up the oven before you use it. Turn it up to Gas 5 / 180c.

Last but not least, taste your pasta. Add some salt for seasoning... And taste again before you scoop 'em up into a casserole dish. Or a deep plate that can be placed in an oven.


Sprinkle on some grated cheese or cheddar cheese slices. Then place the dish into the oven for about 5 minutes or until the cheese has melted, or slightly brown. Ready to serve!

Sorry folks, I didn't manage to take a photo once the pasta is ready to be served. Had to put LittleMissPoochie to sleep because she was tired. Plus we were so hungry that we started to dig in : P
Nonetheless, I think it came out quite good. The pasta was well coated with the sauce. Perhaps a little more sauce would've been nice. Then it would give a creamier texture. 

TheLoyalFan says: "Really liked the mushroom taste. Cheese could be a little less strong though."

Hmmm, I think the cheese I used was a Parmesan. Not too sure myself. The block of cheese has been sitting in the fridge so I use it lor... I think my experiment turned out quite OK. The mini research that I did online helped me also - just to make sure what I have in mind on the methodology is reasonable (methodology... Bombastic lingo :P)

OK, tata everyone! Have a good week and keep cooking!

Wednesday, August 20, 2014

Cooking Again - Crock Pot Chicken

Hey everyone!

It has been a while, okay lah... a long while, that I have written stuff in my blog. Over the past year, I've been busy adjusting with a new member in my family - LittleMissPoochi. She has been a bundle of joy to TheLoyalFan and I ^_^ We are truly blessed and thankful for her well being.

Alrightie then, let's get back to more cooking!

With LittleMissPoochi around the house, I find it challenging to prepare a meal. So Mum taught me a recipe that doesn't require much attention... which is cooking with the Crock Pot a.k.a. Slow Cooker.

The thing about this wonderful pot is that one doesn't need to jaga fire - standing by the hob, ensuring the fire is right in order to avoid our dish being burnt. All you need to do is put in all your ingredients and turn it on. So lots of our mothers (and our grandmothers) like using the crock pot as it can stew the meat, making the meat all sooo soft, juicy and yummy!

First, ensure your chicken is thawed and marinate it. Before you marinate, trim off some of the fat from the chicken in order to reduce the oil. I marinated my chicken with 3 ingredients - Chinese wine, soy sauce and white pepper. This is the same marinate method that I used for my steamed chicken. Cut some ginger into thin strips then soak some gei zhee (goji berries) and yoke chook. For the Chinese herbs, I soaked in water, about 2 or 3 tablespoons of water.


Once your ingredients are ready, put everything including the water from soaking the herbs, into the crock pot. Leave it in the pot for 2 hours. I adjusted the heat to high mode.

And after 2 hours...

Tadaaa!

Chickens were stabbed to check whether inside is cooked ^_^
I must say, this dish turned out great! A variation of my steamed chicken and I.LOVE.IT! Well, I'm a very ching chong kind of person. The sauce was tasty and complemented well with rice. Mum and CuteFuzzyBear gave a thumbs up for my attempt (yay!)

TheLoyalFan says: 'Such a good dish to come home to after a long day. Its good to have sous chef back!'

I'm glad that sous chef is back too! : P

Stay tune for more posts on my culinary journey back home. Till then, keep nommings!


Sunday, July 8, 2012

The Western Week - Day 7 (Finale)


Asian Chicken (yep, you read that right : P) served with tomato & cucumber salad. Sorry folks, I can't think of a proper title for my chicken. Hehehe...


With limited ingredients at home, I was not sure what kind of flavour to prepare for dinner. Herbs were out, and the only ingredients available were my Chinese sauces. So, I marinated the chicken with pepper and a dash of fish sauce. While searing the chicken in a hot pan, I poured some Shao Xing wine and later on glazed the chicken with honey & soy sauce mixture.

For the salad, it was seasoned with pepper, salt, finely chopped garlic and some cooking oil.

The outcome for this round of dinner was nice. However, the chicken was a bit too salty. We suspected that TheLoyalFan dashed 'too much' of fish sauce. But I think if we remove the soy sauce from the honey mixture, it should turned out alright. I wanted to try to make a Char Siew glaze (watched it from "Gok cooks Chinese"), but it didn't tasted as I'd imagined. Nonetheless, the chicken was really juicy and tender. The salad was quite refreshing, wished I had some black pepper as that would create a different taste than the white pepper : )

TheLoyalFan says: 'Tasted very fushiony. It actually reminded me alot of our BBQ marinated chicken at home. It looked a little different at first, but it turned out pretty well and i enjoyed it very much!'

* * * * * * * 
Finally, our Western Week has come to an end. Reflecting back to the objectives that I've set out at the beginning of this, I think we managed to survive just western meals for dinners. To be honest, we cheated. We had Chinese food for lunch : P Guilty as charged! Ho Ho Ho. If we didn't have Chinese lunch, I think we would have died! Yup,  we're true Ching Chong Ling Longs! (hopeless!)

As for the budgeting, I think having Western meals can be cheaper if chosen the right ingredient. For example, if one were to buy chicken, the breast is usually the most expensive compared to thighs or drumsticks because it doesn't have any bones. So that would be a saving. Just to share with you, our usual weekly groceries are average of GBP20 which includes lunch, dinner, snacks and desserts after dinner. However, for our western week challenge, it was GBP 22.00. Not a very big variance mainly because we usually buy the 'in season' vegetables or those with promotion. The reason of the slight increase is the frozen breaded cod. That alone costed GBP 2.00.

Nonetheless, I had great fun with the challenge. I've learnt to appreciate and understand (roughly) a common Western food, at the same time, I also learn't not to take Chinese food for granted. Both are yummy and great!

Mmm... Time to treat ourselves with some Asian food. Hehehehe...

Till then, keep nomming!

Monday, July 2, 2012

The Western Week - Day 2


Butter & Herb Chicken glazed with honey. Served with potato salad and refreshing cucumbers.


I used chicken thighs as they are much cheaper than breast. First, I removed the chicken skin and some fatties around the chicken. Then, using a knife, I gave some 'slits' onto the meat so that the marinate can seep into the meat and to ensure the meat is thoroughly cook too. Rub the meat with mixed herbs and season with salt and pepper, both the top part and the bottom part of the thigh.

Once the pan is hot, pour about a tablespoon of oil just to baste the base. Then place the thighs onto the pan, as flat as possible. Sear both sides for a couple of minutes and put a big knob of butter into the pan. Swirl the pan to ensure all meats have absorb the butter. Close the lid and cook it for 15 minutes.
Occasionally, turn the meat so that both sides are evenly brown. When the chicken meats are cooked, serve. With the remaining oil in the pan, melt a tablespoon of honey together with the oil and glaze the chicken.

The potato salad was made in advanced on Day 1. So we just took it out from the fridge - nice and cold! Yums!

It turned out quite nice, I must say : ) I think if I have an oven, it would probably turn out more moist and yummy too! Cooking with a pan can make the stove area quite messy though : P Nonetheless, it was yummy!!!

TheLoyalFan says: 'I love the chicken. Mmm... it has a very nice roasted herby flavour. Am very surprised that it tastes so good considering that it was pan grilled. Suggested to Souschef that the marinate to be used in barbeques in the future!'

Hmmm... that's a good idea! When we do our next barbeque lah ok?


Cost for Day 2: GBP2.50 for 2 pax

Thursday, June 21, 2012

Lemon Chicken


When I decided that I wanted to try this recipe, I went straight to the Internet to find out how to go about it. After googling here and there, I can't seem to find the recipe that was done by the chefs in those Tai Chow restaurants. So, I resorted to the memories of my past experience and taste at New Paris Restaurant, where TheLoyalFan and I used to have our weekly dating meal there : )

First, cut the chicken meat into bite size piece and marinate with salt and pepper. Rub the seasoning onto the meat pieces before placing them into the batter. I used a dry batter for this round because 1) I wanted to re-use the oil after frying and 2) I'm lazy to clean off those sticky batter from the plate : P

Once that is done, they're ready to be fried. You can either shallow fry or deep fry - either method is A-okay!


Now let's move on to the most important part of this dish - the lemon sauce. Fairly simple I would say, you would need lemon juice, sugar, honey and corn flour. Squeeze out the juice of a lemon and add about 3 to 4 heap spoonfuls of sugar. The sugar is to 'neutralize' the sourness of the lemon. Adjust the amount of sugar based on the volume of the lemon juice. Make sure that the mixture is still a little bit sour, but too sour : ) If you find the sugar is difficult to dissolve, add in some warm water. In a separate bowl, prepare a teaspoon of corn flour mixed with some water. Perhaps 4 tablespoon of it.

Pour the lemon mixture in a pan on a low heat setting. Add in about 2 teaspoons of honey and mix evenly. Then slowly add in the corn flour water. As you add the corn flour mixture, keep stirring until the sauce thickens. Remember not to make it too sticky because when the sauce cools down, it might turn out to be lumpy. Taste the sauce. If it is still too sour, you can add in more honey. This part takes some trial and error, but don't worry, it turn out just fine.

Once the sauce is complete, drizzle onto the fried chicken.


With some time and patience, this dish turned out quite OK. The fried chicken was crispy and the sauce complimented well with the chicken. And along with rice too! But one thing to note for me was to make the sauce a little bit thicker. I'll need to work on the corn flour estimation... still bit rusty in this area : P  Other than that, I felt it was quite a successful experiment.. Yay! 

TheLoyalFan says: 'It tasted really yummy even though I had the flu: ( I really like the fried chicken coated with the light & sour sauce. I'm a very big fan of simple food.'

Thankfully it turned out fine : P I was worried that my experiment would fail... hehehehe.

Till then, keep nomming!

Monday, June 4, 2012

Chilli Pan Mee


Chilli Pan Mee is a modified version of a normal Pan Mee. However, this version is equally as yummy too! In an effort to finish up some of our ingredients at home, here's our take on a slight modification of this recipe...

Here goes...

Dried Chilli
The most important ingredient for this recipe I must say. Without it, this dish would be just an ordinary pan mee. Mince / Blend in a food processor some dried chilli, dried shrimps, fresh chilli, onion & garlic. My portion for these ingredients are 2 portions of dried shrimps, 1 portion of soaked dried chillis, 2 fresh chillis, an onion (a couple of shallots are fine too) and 3 cloves of garlic. If you want it more spicy, feel free to add a portion of dried chillis and perhaps reduce 1 portion of shrimps.


Starting with a high heat, fry the mixture with some oil. Once there's some fragrance, quickly turn to low heat and keep frying until mixture is dry or at least 30 minutes. This can be made in advance and you can eat this with other food too!

Ikan Billis (Anchovies)
Give a quick wash for the ikan billis and drain the water from a microwaveable plate. Glass or ceramic would be better than melamine plastic plate. Then placing it in a microwave, put in on a 3 minute timer to 'heat / cook' them up. Give a quick toss to even out the billis on the plate. Keep repeating this process until ALL the ikan billis are dry and crispy! Be patient as it may take a while, depending on the amount of ikan billis you place in the plate. This is another ingredient that you can do in advance!

Noodles
Ahhh... this is easy peasy! The ingredients for this is the same as my 'Ken Tiao Pan' post. Once the dough is ready, cut the dough into smaller chunks. Using a roling pin, flatten out the dough until it is really thin. Cover the dough sheet with lots of flour and lightly roll / coil up the dough as though you're rolling up a carpet.

Make sure it is not too tight. Then cut the dough sheet into thin slices and unravel each piece to get a strand of noodle! Well, if you have a pasta maker it would be WAY easier and faster to make them. ^_^


Meat Sauce
Dice up chicken meat and marinate with soy sauce and white pepper. Then in a pan with some hot oil, fry some diced onions until fragrant. Pour the diced chicken and its marinate into it and keep frying. Season with wine and oyster sauce. Add some water to let it simmer. As this will be sauce for the noodle, please season it saltier. Thicken the sauce with some corn flour mixed with some water but this is entirely optional.

Once all these ingredients are ready, you are ready to make your own chilli pan mee!

Cook some noodles in a boiling water. Remember to stir the noodles in order to separate them out. This is to make sure every strand is thoroughly cooked and not lump together. Once the noodles are cooked, take them out and place on a plate. Pour alittle bit of oil / sesame oil and give it a quick toss so that it doesn't stick together.

Now, Chilli Pan Mee is not complete without an egg, specifically poached egg. As this was my first time, I saw one of Jamie Oliver's show and he did this method. So I thought, try lah! Place cling film that is cut to a square shape in a bowl and beat an egg. Gather up the cling film starting from one corner until you reach the third corner. Twist the fourth corner until it looks like a string, then go around the gathered corners and tie it up. Place the egg in a pot of lightly simmer water (on a hob) for about 2 - 4 minutes, depending how firm you want to cook the egg yoke.


Once done, open the film and scrap the egg onto your noodle.

When your poached egg is ready, it's time to serve up! Tadaa!


Phews... The outcome of this dish was simply lovely! It just reminded us so much of the Super Kitchen or Kin Kin's version. Hence, we sort of concluded that it is very difficult to make but it does require alot of time and effort to make this dish... and manpower to fry those chillis! Hehehehehe... Nonetheless, we were very pleased with the outcome.

For this dish, there are a number of things that were my first time and I would like to note them here too... (Forgive me for 'extending' my post : P)

Dried Chili Paste
As I was frying this, the fragrant of the dried shrimps reminded me so much of those tiny spicy spring rolls that we get to eat during Chinese New Year. Perhaps with lesser chilli, we can try to make the tiny spring rolls? Mmm... thinking about it makes me excited already.

Poached Eggs
If one were to use the cling film method, remember to rub a thin layer of oil onto the cling film. Otherwise, egg would get stuck. Perhaps soft boiled egg method would be easier than this. Nonetheless, it is a new skill I've learnt and it was kinda fun although the eggs got stuck! : P

TheLoyalFan says: 'It's surprisingly easy to make! Just very tedious. The result was very satisfying... I love home made noodles!'

Yum yums indeed! But the thought to make it again sounds tiring... Nonetheless, it was great fun and now we'll appreciate those shops back in KL. Till then, keep nomming... and nomming away!

Saturday, May 26, 2012

Marmite Chicken


Finally! After contemplating for a couple of months whether I should get a bottle of Marmite, we finally bought one! Yum yum YUMMMMY! I LOVE Marmite very much, especially when I mix it with a plate of porridge. Mmm... the aroma itself makes me drool too!

And since we have a bottle of it, we thought 'let's try to make the Tai Chow's Marmite Chicken!'
Tai Chow = Literally means big fry in cantonese. However in Malaysia, it means a Chinese restaurant that serves simple dishes at reasonable prices during lunch & dinner times.

We managed to google up some recipes that have been tried and tasted by other fellow bloggers. And we decided to try this simple recipe from Pig Pig's Corner...

First, chop up the chicken into bite size pieces. Then marinate with Marmite, honey, soya sauce, a dash of white pepper and some cooking wine. I've put 2 tablespoons of Marmite, 1.5 tablespoons of honey, 1 tablespoon of soya sauce. If the honey that you're using is not a premium quality, like kinda diluted or less sweet, then I would recommend to add another tablespoon for good measure : ) Once marinate is complete, place the chicken back into the fridge for at least an hour.

Once you're hungry (hehehehe...) or ready to cook the chicken, heat up some cooking oil. Pour alittle bit more than your usual frying, perhaps another tablespoon will be OK. Fry some garlic until it is fragrant and then pour the chicken meat along with the marinate into the pan. Keep frying until the sauce has been reduced and you can feel that there is the sticky texture formed due to the caramelisation of the honey.
Taste the chicken and if you feel it is bland, add in some water and some marmite into it. Repeat the frying process until the sauce has been reduced.

Marmite Chicken! Wished it was on a bed of lettuce though...
Marmite Chicken with vegetables, on a bed of fragrant white rice! Yums!

My first attempt turned out quite OK (phew) although it has a stronger Marmite taste. One thing to note is that if you keep frying and not letting the chicken just sit and simmer away, it would give more Wok Hei : P Wok Hei = Translated directly as Wok Smell. A term the Chinese used to describe aroma of the dish.

TheLoyalFan says: 'The sauce was sooo good.Sticky and caramel-ey. My plate of rice disappeared in seconds!'

Mmmm! Marmite, you're the best!

Monday, April 2, 2012

Steamed Chicken


Steamed chicken is a very 'ching' dish. 'Ching' which literally means, clear in english, doesn't just mean it has clear gravy or a bland taste. To the Chinese, it simply means a simple and tasty dish but its flavour is not too overwhleming. Somehow this 'ching' taste comforts one's soul. Well, for me, 'ching' dishes always make me feel happy and all fuzzy inside : P

There are a couple of ways to make this steamed chicken. One is to marinate the chicken with salt and steam it; the other method will be marinating more than just salt. The Hainanese has its famous steamed chicken method where it is boiled in boiling water and soaking the cooked chicken in icy cold water. But today, I found a recipe that is simple yet very tasty.

Firstly, ensure your chicken meat is completely thawed to room temperature. This is to ensure that all areas of the meat has a consistent texture and the meat will be cooked evenly. Give the meat a good rinse and place it in a plate. Marinating requires only 3 ingredients - Chinese wine, white pepper and light soy sauce. For this, I recommend that the soy sauce and wine should be 3 tablespoon each. Scatter some shredded ginger onto the chicken.

Prepare the pan/wok with water and a steaming stand. Once the water is boiling, place the plate onto the stand and let it steam for about 30 - 40 minutes. Occasionally, use a spoon and drizzle he juice in the plate onto the meat.

Once the chicken is completely cooked, drizzle on some garlic oil and spring onions.


Tadaaa!

Doesn't it look yummy? Well, not only did it look so yummy, I was already drooling when I smelt the aroma of it! *slurp slurp slurp*

The chicken meat was really smooth and tasty. It reminded me so much of the 'pak cham' chicken back home at the chicken rice shop. We didn't make any oyster sauce dip as there were lots of good nutritious chicken 'essence' stored in the plate. The essence was tasty and not too salty. Also, it was really nice with rice too. Ooo... what a feeling! *nom nom noms!*

TheLoyalFan says: 'Super smooth chicken and extremely yummy sauce. Our extra helpings of rice did not last long... hehehe.'

*Blushing* Yea... it was really good and I had second helpings of rice : )

Till then, keeping nomming!